Friday, May 25, 2007

One raised bed coming up!

"For which one of you, when he wants to build a tower, does not first sit down and calculate the cost, to see if he has enough to complete it?" Luke 14:28
We didn't build a tower, but rather a raised bed. And I'm pretty sure we purchased enough materials to complete the job (see yesterday's post). Here's a quick run-through of how we did it.


From the highest point, figure out where the land drops 18" (laser level & yardstick works for this). This determines the length of the bed. Our mower & tiller determined the inside width (4').

From the lowest point, lay timbers - leveling the ground as necessary. When the bottom row becomes even with ground, go back to the lowest point and start a new row of timbers. All the while, use a tape measure to keep the inside width consistently 4', a 6' bubble level to make sure the two outside walls are the same height, and a smaller bubble level to make sure each timber is level in all directions.

From the lowest point, mark every three feet on both sides. Girls, fingernail polish works great for this! Alternating between a 1/2" bit and a 5/8" bit, drill a hole at every mark. A 3' drill bit allows you to drill all the way down the ground. Standing on the timber helps secure it while you drill (I stood on the other end).

(NOTE 8/28/07: We found using the larger drill bit allowed the timbers to pop up. From here on out, we will always use a drill bit the same size as the rebar.)


Next, at each hole, measure from the ground up and add 18". Cut pieces of 1/2" rebar to this length and place next to appropriate hole. On each side wall of the bed, drive the rebar into the holes using a sledge hammer. The holes drilled with the 5/8" bit will be a breeze. However, the holes drilled with the 1/2" bit will be quite a work out! Don't drive rebar into the end pieces - yet.

Here's the finished product! The timbers are stacked and leveled, the pieces of rebar have been driven into place (except on the ends), and we're ready to start adding dirt. See you tomorrow!

Thursday, May 24, 2007

We're starting to dream!

"And they said to one another, 'Here comes this dreamer!'"
Genesis 37:19
Yes, we're finally able to move on from clearing the land to developing the land. First things first, though: patio leading to the front door. But where do we put the excavated dirt? Of course - in a raised bed for vegetables! But what materials will we use to build the raised bed? Of course - landscaping timbers!

We ordered the materials: 2 bags of sand, 3 pallets of flagstone, 1 pile of quarter minus gravel, and 7 units of landscaping timbers. Yes, 7 units of landscaping timbers. Half a semi. 420 pieces. Why, you ask, do we need 420 pieces of landscaping timbers? Simple. Not only are we building several raised beds, but we plan to use the timbers for terrace walls, as well. (You only see 4 units in this pictures.)

It really doesn't matter that we ordered the materials first because the patio is relatively small and won't take that long. Right?

And another thing. Some of those rocks are pretty large - taller than me. How are we going to handle those without breaking each one? Of course - the new tractor!

Wednesday, May 23, 2007

What is it?

"But their eyes were prevented from recognizing Him." Luke 24:16
Don't look at the next photo.

Do you know what this is?

I think it looks like a bone-in spiral ham.

Hubby thinks it's a sea shell.

Wanna take a guess?

Actually...

it's the...

end of...

a piece of firewood!

Isn't it funny how things are more confusing when we don't see the big picture? Life can be like that at times. Fortunately, He knows everything!

Tuesday, May 22, 2007

Hubby's new plow

"You shall not plow with an ox and a donkey together." Deuteronomy 22:10
OK. But what about a backhoe and a scoop together?

Eventhough we live in town, we still have enough land and projects to warrant a small tractor. This little baby was delivered several weeks ago and has been used quite often. It's a 38 HP Kioti with front scoop and back hoe as pictured. However, we also purchased a pallet forklift and blade for grading.

Now we can get some real work done! Woo Hoo!!!

Monday, May 21, 2007

Revealed with fire

"...each man's work will become evident; for the day will show it, because it is to be revealed with fire; and the fire itself will test the quality of each man's work." 1 Corinthians 3:13

Absolutely nothing compares to watching fire. The flame is changing constantly; the wood is transformed dramatically; even the smoke heats to the point of flame. I can be mesmerized for hours, losing all track of time.

Look at this picture. You only see those objects near the flame, revealed by the light. All else is dark. All else is hidden. All else is private.

What's happening in the private areas of my life? How do I behave? What do I think? Am I selfish? Of course, I am. In the private areas of my life, I don't want to think of others. I don't want to be concerned with anything but my own desires.

Incredibly greedy, aren't I? The LORD understands, though. He's patient with me. And He's lighting the way.

He knows my heart does not want to be self-centered. He knows I would much rather live in the light where I can see what's going on - where He can be glorified. Is He always glorified in the private areas of my life? Not completely, yet. But I'm getting there. He's patient with me. And He's lighting the way - through His Word.

He meets with me each morning before I start my day. He walks with me throughout the day as I work. He rests with me at night as I prepare for tomorrow. He's patient with me. And He's lighting the way - through His Spirit.

Sunday, May 20, 2007

Tree + Axe = Firewood

"And the axe is already laid at the root of the trees; every tree therefore that does not bear good fruit is cut down and thrown into the fire." Matthew 3:10
Another willing sacrifice for the sake of firewood (and garden). We're talking about the tree in the background with the three main branches. If you look at yesterday's post, this tree would be located directly behind the tall tree on the left. You can't actually see it in the photo, though. The yellow cinch cord is attached to the branch leaning heavily to the right (and even more heavily toward the neighbor's yard).
The chainsaw may be hit and miss; however, the axe is always ready for action. Hubby whacked away until the branch finally gave way. Somewhere in the middle, the cinch cord was moved from the supporting tree to the hitch on the back of the truck. The theory was to persuade the branch to fall toward our property and not over the fence.
Try as we might, the branch was not to be persuaded. However, please take note of its angle. Never once did it actually rest on the fence. The Lord certainly was the Expert Landscaper here. We were able to trim it on-site and get the bulk of it back on our side of the fence with no damage. I'd say that was a minor victory! And the end of our day. The other two branches can wait.

Saturday, May 19, 2007

Another one bites the dust.

"A good tree cannot produce bad fruit, nor can a bad tree produce good fruit." Matthew 7:18

Notice the tall tree on the left. It's located on the western-most edge of our property just in front of the house. This poor thing had to go. The seed pods dropped off like flies and took root where ever they landed. What a mess! This photo was taken the morning Hubby "transformed" it into firewood.

On the right side of the photo you'll notice trees located closer to the house. One day, these will be gone, too.

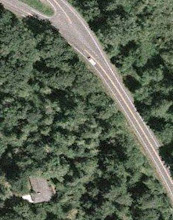
As you can see from the aerial view, we have no grass. As you come down the driveway, don't you agree grass would be a lovely view?